Building a beautiful bathroom that will last takes a lot of planning and tight procedures. And so starting with that statement, I’ll divide this page into two sections as some clients will want a more detailed look at how their projects are handled.
A summarized excerpt:
We are not afraid to show what’s underneath the work. With proper installation of waterproofing and shower systems, wall boards, plumbing and other fixtures, we pride in being able to showcase a project that will last.
In more details
Just as an example, I will itemize the tasks in doing a tub to shower conversion after acquisition of materials-
1. Removal of tub either in full with an acrylic tub or cut into sections with cast iron.
2. Removal of tiles and existing wall boards to stud finish.
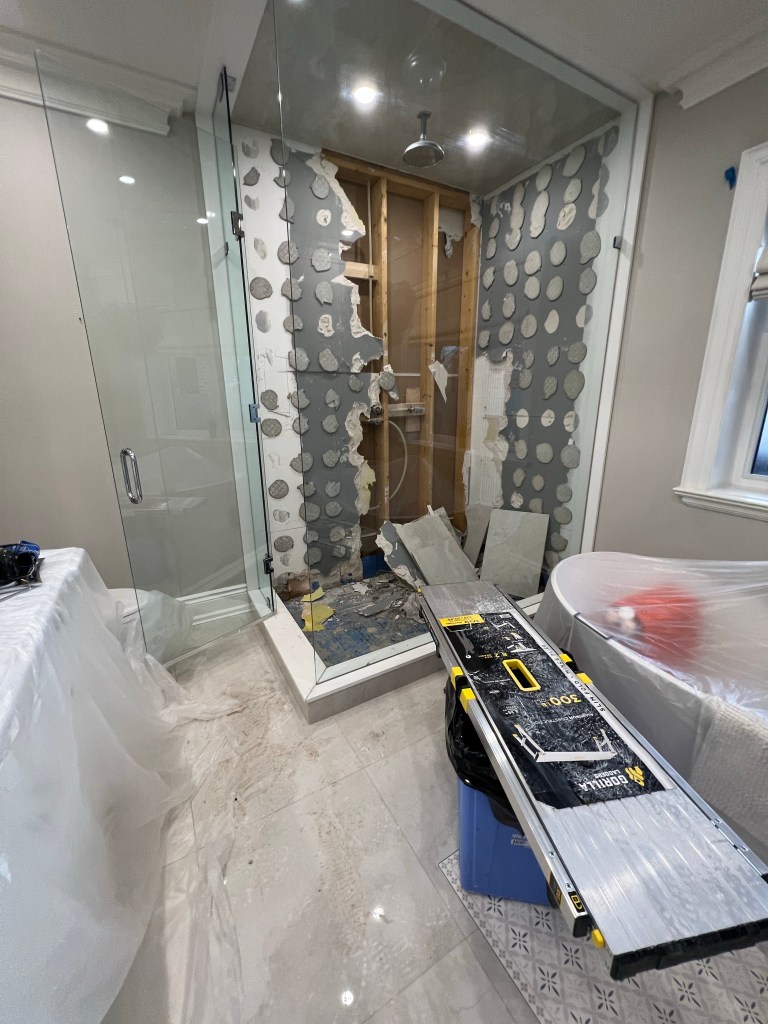
3. Repairs done to damaged studs and framing done for needed niches and bench with dimensions and heights accounting for tile size and shower base heights to achieve best visual look.
4. Plywood floors or concrete foundation to be removed for plumber to do new rough in’s and move drain to be set centred to shower head/visually appealing components. Repairs done prior to shower setup.
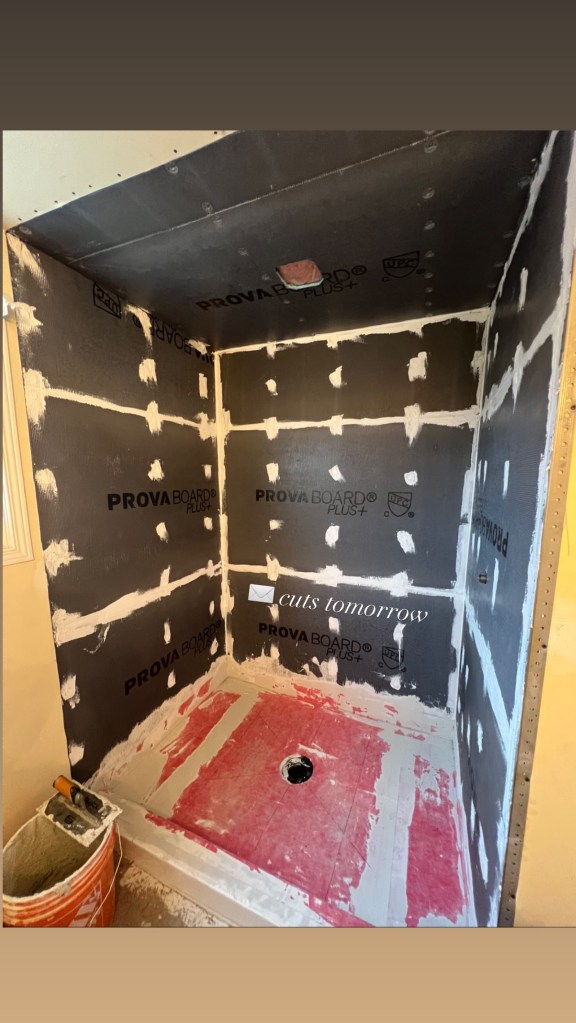
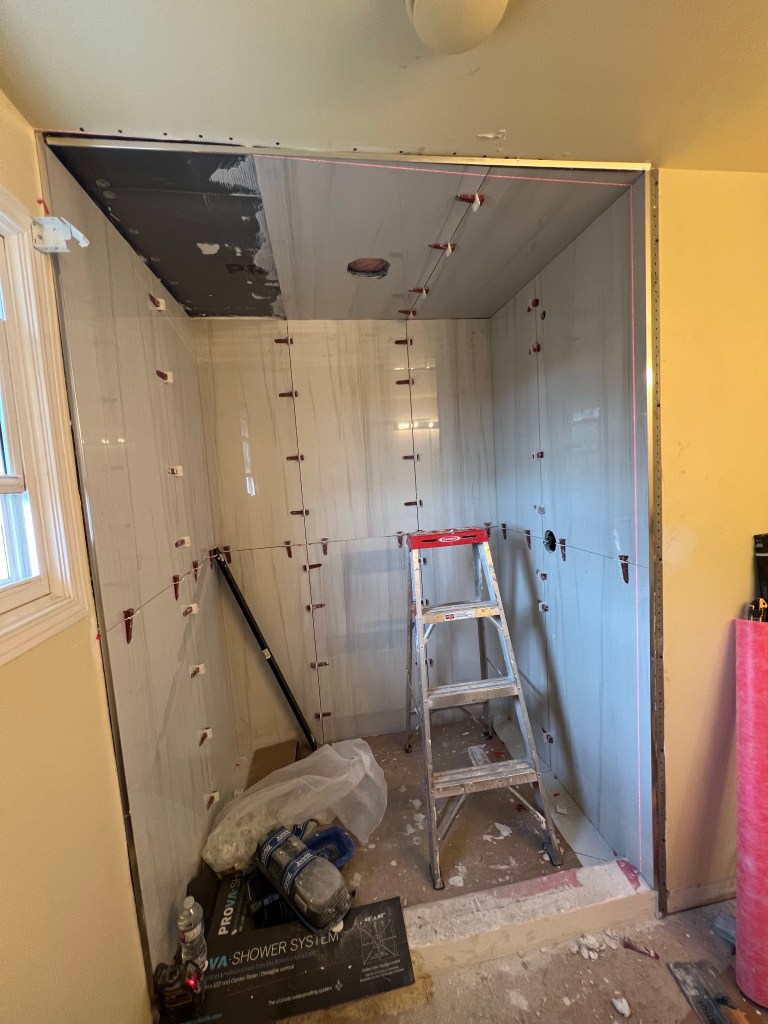
5. Tileable foam boards are preferred for reduced dust and best possible waterproofing. Ceiling foam boards to be installed with adhesives between studs and board to achieve a sturdy foundation for ceiling tiles. Electrical to be lined up for wet area class potlights within shower or lining LEDs for top niche lighting.
6. Repair of floors and spray foam on perimeter if any self levelling is needed.
7. Setting up the curb and foam shower base and additional base extensions if larger shower.
8. Waterproofing all exposed screws, joints between wall boards, wall and floor perimeter banding.
9. Cutting drain to ptrap to appropriate lengths for shower flange and adjusting drain height depending on shower floor tile thicknesses. Tile shower floor to be installed with drain cover carefully taped for protection.
10. Floors to be protected next day prior to wall installation to reduce any damage that could occur during wall and ceiling tile installation.
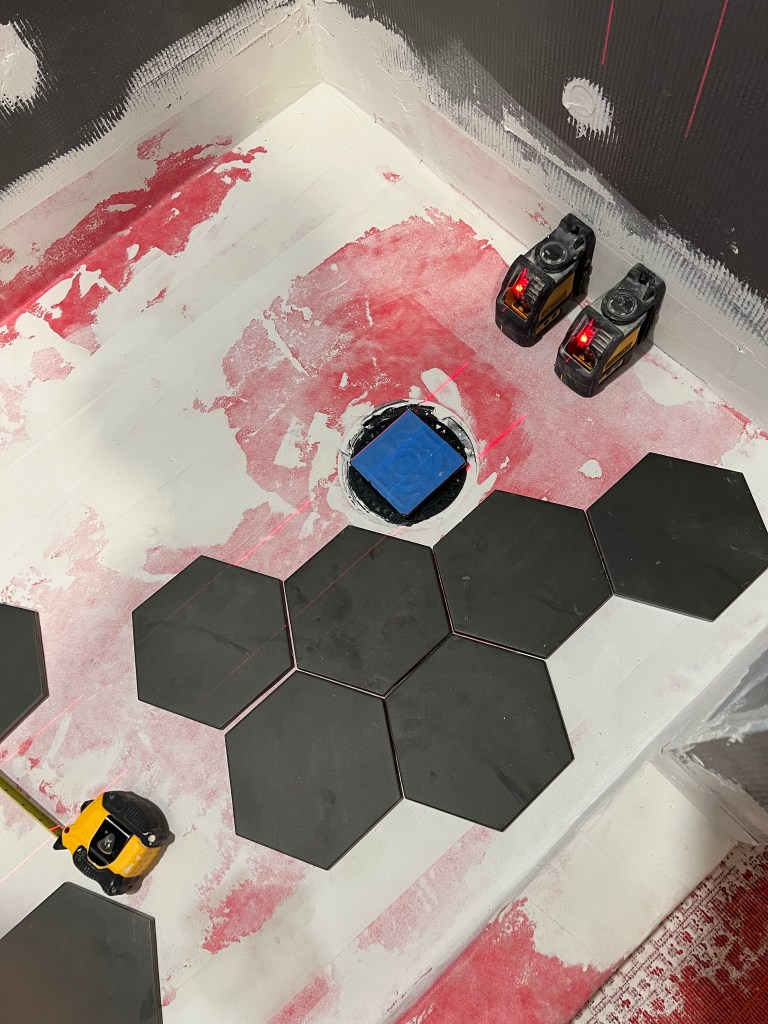
11. Layout of tiles must be visually appealing to reduce and strip cuts and acknowledgment of niche cuts. Most installations involving 12×24 tiles installed with a 1/2” notch trowel on wall, backbuttered on the tile and spaced with (1/16” spaces on most jobs) perfect level master clips to maintain a flat installation.
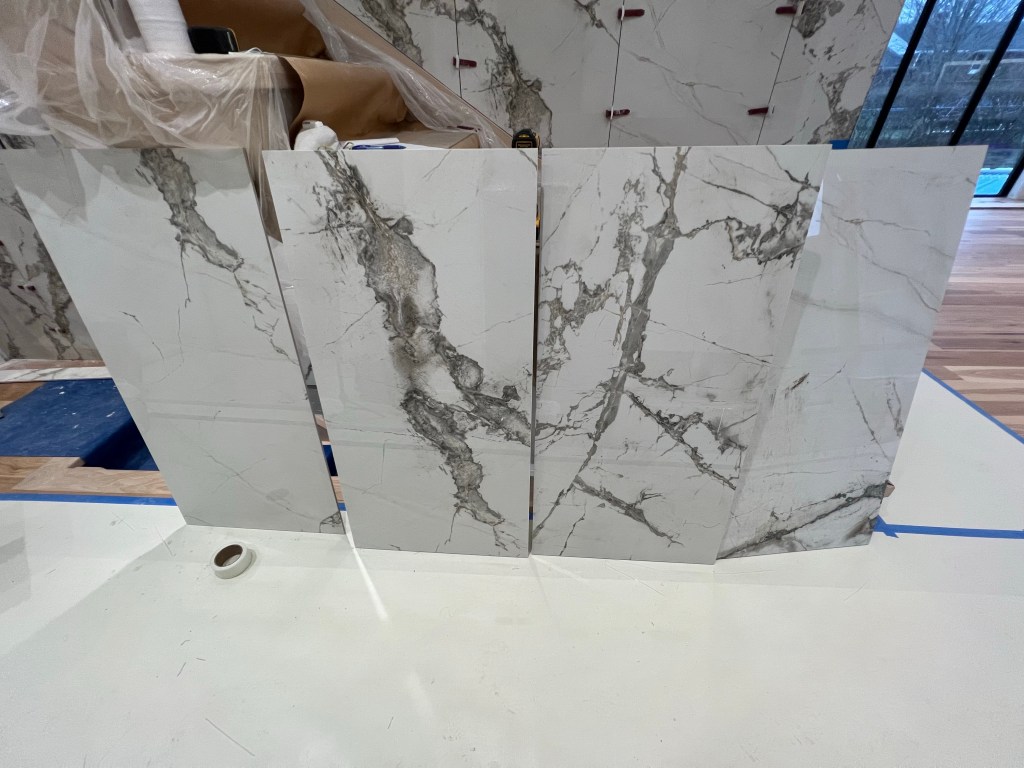
12. Back wall to be installed flat to walls and lines adjusted to be level using precision gained from experience and usage of laser levels. Cut offs are sometimes kept aside when trying to achieve a wrapped look. Tiles that are large format with dedicated veining to be installed with patterns that are visually appealing, which can include opening a multitude of boxes to get more choices in variation. As installation reaches the ceiling portion of the tile installation, a gap is added to have more protection for the clients so that the ceiling sits snug on the perimeter of wall tiles.
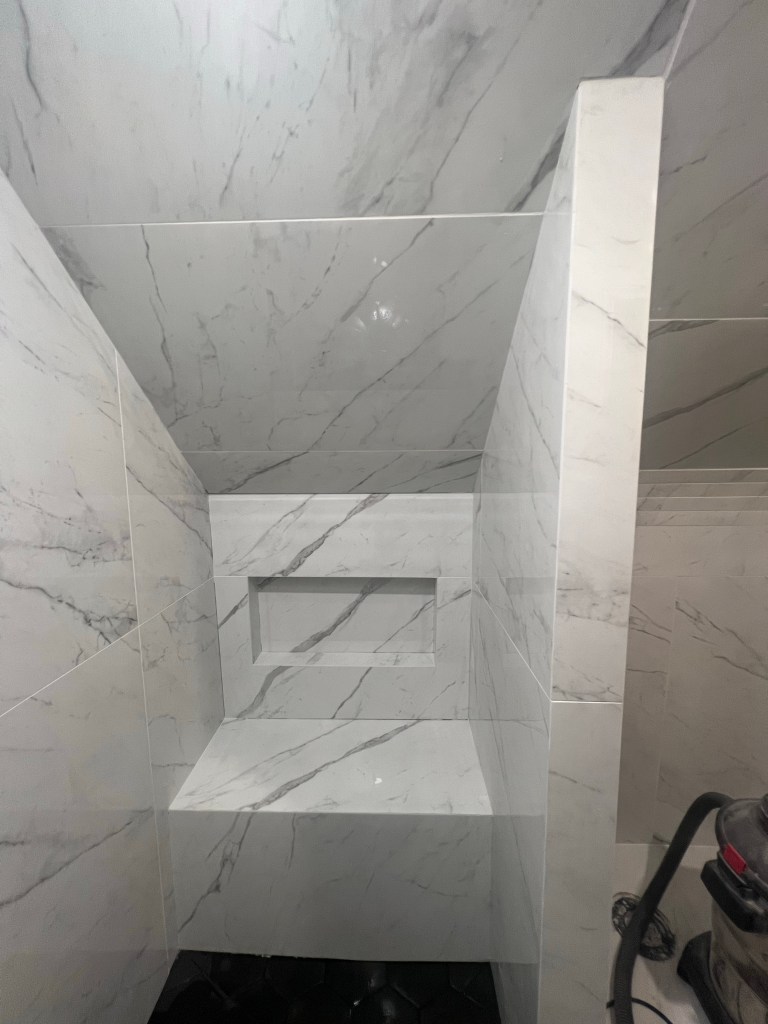
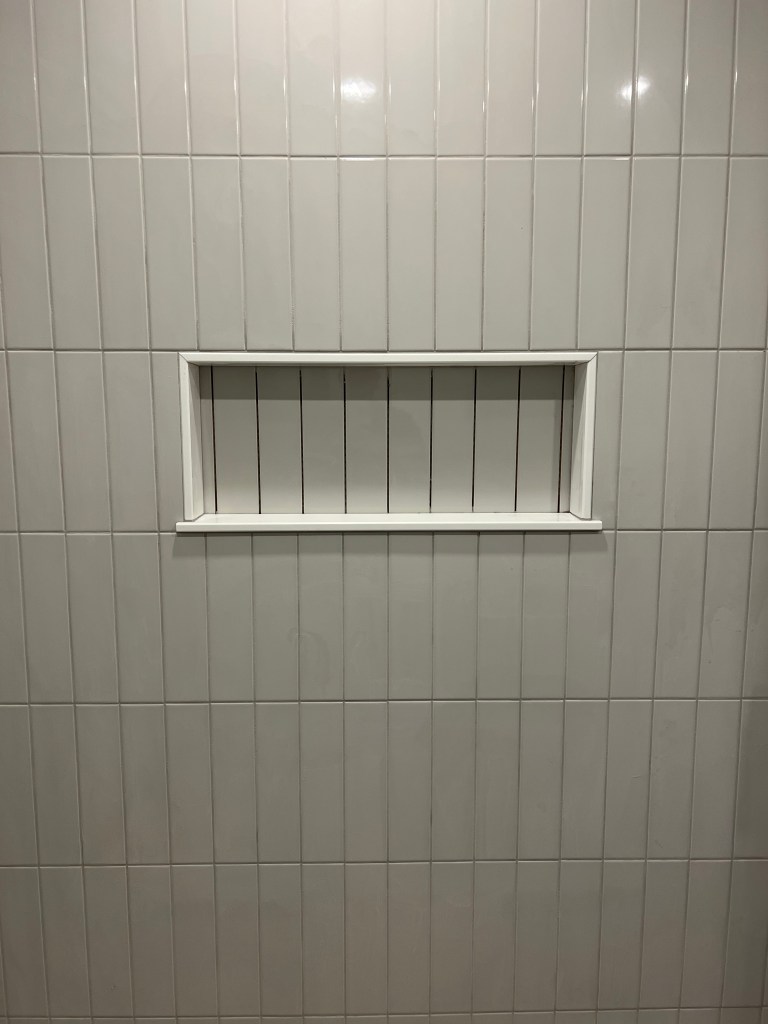
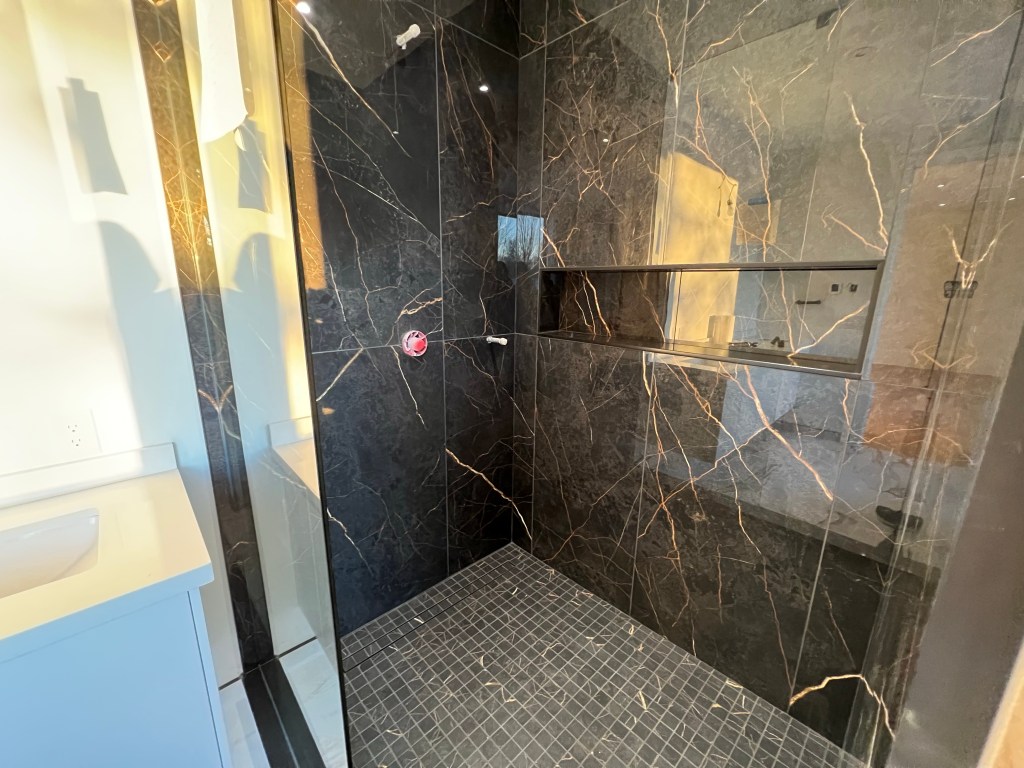
13. Once niche perimeter has been tiled, consideration for materials here are needed as some clients will want the mitred look for a seamless look or utilizing a quartz base that extends from the walls to have a bigger area for shampoo bottles. For those who don’t wanted to spend the budget on additional labour, J-trim or colour matched steel trim can also cover the factory edges for a clean look. Note: if mitred aspects are needed for the job, knife grade epoxy is mixed to match the joints to achieve a continuous colour is done near finish day.
14. Once the back wall is set, the side walls are carefully measured to achieve the most visually appealing look and reduced usage of strip cuts. From a more advanced perspective, we do try to start with a factory finished or full tile on the outer edge of the encloser. The reason for this is the back wall can sometimes be out of level leaving bigger joints in the inner corners so instead of getting that problem, we can adjust to have a full tile on the outer edge and finish the inner corners with a tighter joint. The two types of edge trims to cover the outer edge can be a J trim with wraps and hugs the tile having a 1/16” joint sticker around the edge(meant for tiles that are not factory edged) or using a trim slightly larger to the thickness of the tile to achieve a more seamless look.
15. Ceiling tiles are installed double back-buttered to achieve a stronger durable set up and to close up the gaps left on the three other walls. Depending on the size of tiles, mitred joints on edge trim can be done. Potlight cuts are done with exact precision as most potlights only give a 3/16” tolerance.
16. Once the enclosure and ceiling is tiled, the curb will be covered with a quartz threshold or finished mitred depending on the clients budget. The face of the curb will be matched with bathroom floor tile or matched to have the same joints and pattern as back wall.
17. As the installation is finished and appropriate time is set aside to let the tiles set, the clips are taken out carefully and joints to be cleaned completely. Grout bags are shaken prior to mixing to have a more consistently dye content as most dyes settle near the bottom during transportation. The floor protection on the shower floor is now removed and depending on whether or not there are multiple colours for grout, taping may be involved to keep the lines clean and separate any unappealing colour mixing.
18. Depending on whether or not the tiles are rectified or rounded, the grout is installed to TTMAC standards.
19. Finishing the inner corner joints with a colour matched silicone to grout is then applied as inner corner joints are susceptible to normal movements.
20. Microfibre finish on the tile surfaces to remove all the grout haze.
21. Installation of finish shower hardware (shower heads/tub spouts/control valve handles and plate/grab bars/shower panels and potlights)
22. Shower door installation that can be pull out or sliding with matching hardware(black/chrome/titanium)
23. And voila, the shower is complete and you’ll be ready to enjoy the shower you deserve!

Leave a comment